 Add Row
  Add
Add 

Maximize Your Closet Space: How to Hang a Long Clothes Rod
Transforming your closet from a cluttered space into a well-organized haven is easier than you think. If you’ve ever encountered the frustration of a fallen closet rod, you understand the importance of proper installation. Here’s a step-by-step guide that not only highlights essential tools and materials but also reinforces best practices to ensure your clothes rod remains steadfast.
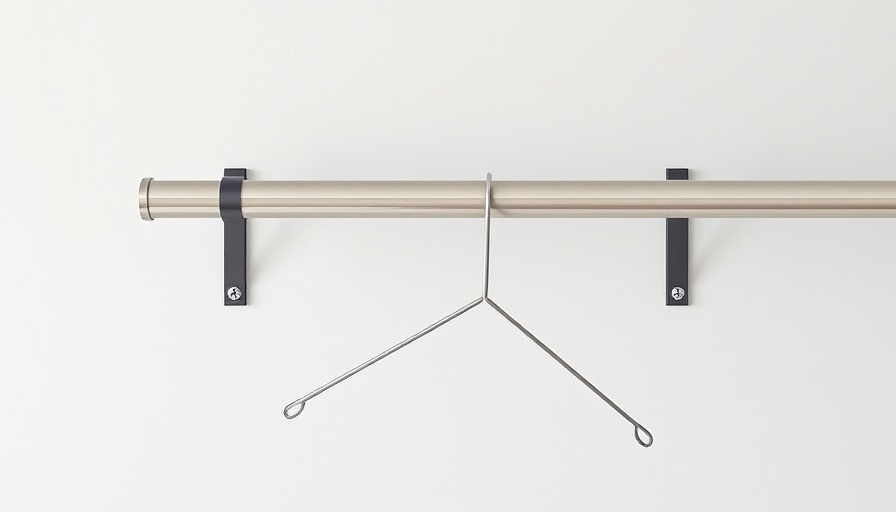
Assess Your Needs and Choose the Right Rod
Before diving into installation, it's vital to assess your wardrobe needs. Consider whether a wooden or metal rod best suits your style and weight requirements. Metal rods tend to handle heavier loads better and are less prone to sagging over time, making them an ideal choice for those with an extensive wardrobe.
As you gather materials, keep in mind that the standard diameter for closet rods is 1-1/4 inches. Ensure the brackets you choose are compatible with the rod size you select for seamless installation.
Prepare Your Space: Measuring and Marking
Proper preparation is key to successful installation. Use a stud finder to locate wall studs—it’s essential to anchor your brackets securely for weight distribution. Once you know the location of your studs, measure the desired height for your rod—typically 60 inches for single rods and 40-42 inches for a double rod setup. Mark these measurements on the wall to serve as installation guides.
By measuring and marking accurately, you prevent future issues with misalignment or instability.Install Support: Proper Placement of Brackets
With your measurements in place, it’s time to install the brackets. Start by securing them at each end of the rod and in the center for stability. If you anticipate hanging heavier clothing, don't hesitate to use additional brackets. This precaution ensures your rod can handle a full load without risk of collapsing.
Follow the manufacturer's instructions when attaching the brackets, and always ensure they are level to keep your rod straight and your clothes neatly hung.
Test and Adjust: Ensuring a Secure Setup
Once installed, it's crucial to hang a few items on the rod to test for stability. Gently tug the rod to assess its strength. If you notice any wobbling or instability, revisit your anchors and brackets—tightening them may be necessary for optimal security.
Regularly inspecting your closet rod and the weight distribution of your garments can help prevent issues in the future. For instance, avoid grouping heavy items together to prevent sagging.
The Benefits of a Well-Organized Closet
Successfully installing a long clothes rod not only enhances organization but streamlines your morning routine. A well-structured closet allows for easy access to your garments, reducing time spent searching for that perfect outfit. Additionally, proper installation techniques contribute to the longevity of your storage solutions, paving the way for a clutter-free life.
As you embark on your closet organization journey, remember that a few thoughtful steps can make all the difference. An organized closet isn't just about aesthetics; it's about functionality and ease of use. So gather your tools, follow these steps, and enjoy a beautifully organized wardrobe!


Write A Comment